
Unlock timeless elegance with herringbone wood flooring—your step-by-step guide to mastering this classic pattern for stunning modern spaces.
Why Choose Herringbone Wood Flooring?
Historical Elegance Meets Modern Interiors
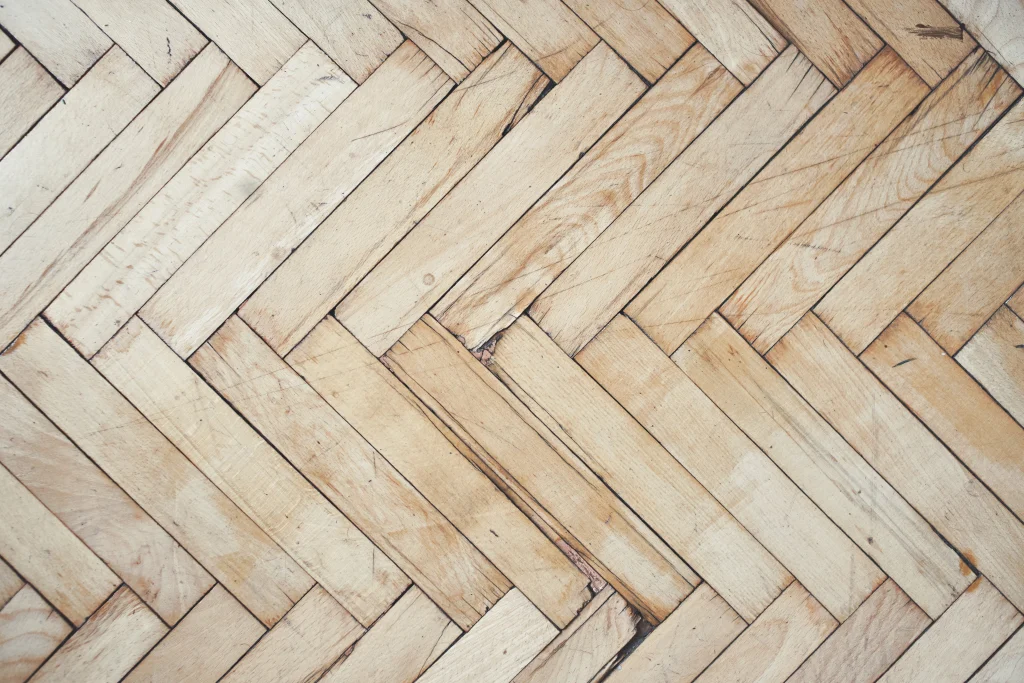
Herringbone flooring goes way back to Roman roads and old fancy palaces. It stands for luxury and great work. Today, its neat, angled design adds a fun rhythm and classy look to homes and shops.
Chevron vs. Herringbone: Know the Difference
Both patterns have zigzag shapes, but herringbone planks meet at a 90-degree angle for a broken V look. Chevron floors are cut at a slant for a smooth V, giving a sharper style.
Where It Works Best
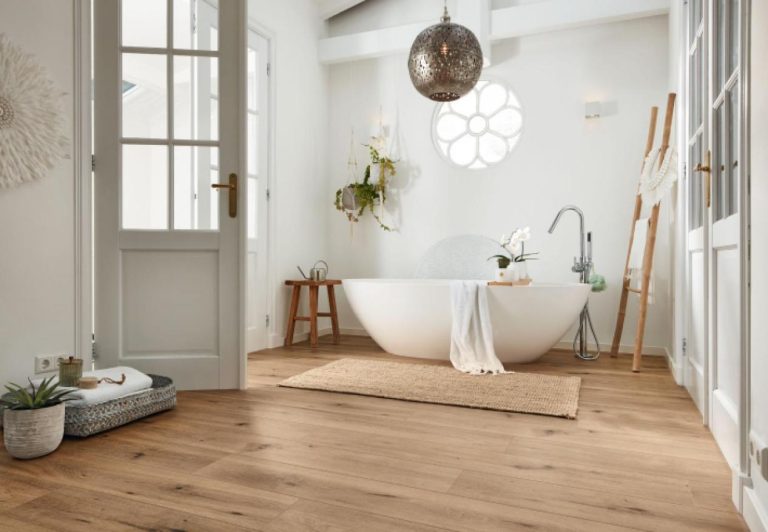
Herringbone is awesome for big-impact spots like front halls, living rooms, or store insides—any place you want to make a visual statement.
Tools & Materials You’ll Need
Recommended Flooring Materials
We suggest using engineered wood flooring or solid hardwood planks with tongue-and-groove joints. These offer long-term durability and better stability—especially important for herringbone patterns that require precise alignment.
Our company offers a range of pre-cut herringbone modules in oak, walnut, or custom finishes, ensuring consistency across large projects.
Tool Checklist
- Miter saw or chop saw
- Flooring nailer or glue
- Spacers and chalk line
- Tape measure and square
- Router (for custom groove cuts)
- Safety stuff (gloves, goggles)
Subfloor Preparation
Remove Existing Flooring
Start by pulling up old carpet, vinyl, or beat-up hardwood. Clean the area well and check if it’s flat.
Moisture Protection
Put down a water shield like plastic sheeting or underlayment to keep your wood floor safe from dampness. This is extra key for shops or ground floors.
Acclimate Your Flooring
Let the flooring sit in the room for 48–72 hours before starting. This stops it from growing or shrinking after you put it down.
Layout & Dry-Fitting the Pattern
Establish Centerlines
Use a chalk line to mark the room’s middle, both long and wide. Herringbone needs perfect balance, so getting this right at the start is a big deal.
Use a Jig or Trammel
For super neat work, try a jig or make a dry test layout. This keeps 90-degree angles and makes the floor look even all over.
Dry-Fit First
Lay out a few rows without glue or nails. This lets you see how it looks and tweak things before you lock it in.
Cutting & Preparing Planks
Measure and Cut Accurately
Cut planks to the same length, usually a number that matches their width (like 600mm long for 100mm wide). A stop-block on your saw keeps cuts the same.
Add End Grooves
If you’re using plain wood, use a router to make grooves on both ends for tight tongue-and-groove fits. Yehui’s factory makes pre-grooved herringbone panels that save time, great for big shop floors.
Installation Process
Start from the Center
Begin where your chalk lines cross. Place the first two planks in an L-shape to make the classic herringbone “arrow.” Use a jig to keep them lined up right.
Secure Each Plank
Put on flooring glue or use a nailer, depending on your subfloor. Press planks down and wipe off extra glue right away.
Continue Row by Row
Work out from the middle in rows. Check alignment often. A laser level or straightedge keeps lines super straight.
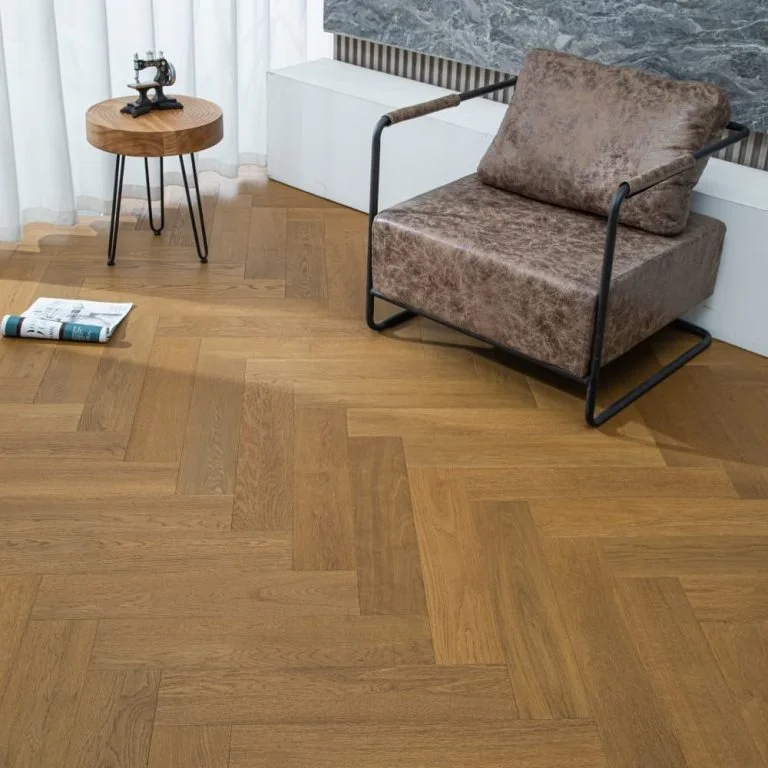
Borders and Edge Pieces
Cut Custom Filler Pieces
When you hit the walls, cut filler pieces to fit. Use a jigsaw or table saw to make triangles or trapezoids for the border gaps.
Install Perimeter Boards
Some folks add straight planks around the herringbone for a clean edge. This looks neat and makes wall transitions easier.
Finishing Touches
Sanding and Sealing
If you used raw wood, sand it smooth. Add stain and sealant to make it tough and pretty. If you need it, Yehui can help you purchase matching UV paint.
Install Trim and Thresholds
Put back or add new baseboards and transition strips. These hide gaps and give a polished look.
Clean and Maintain
Vacuum and use a microfiber mop to clear dust. For long-term care, use gentle wood cleaners and don’t soak the floor with water.
Troubleshooting & Pro Tips
Common DIY Mistakes
- Starting with bad alignment
- Skipping wood acclimation
- Hurrying cuts or using uneven plank sizes
Time and Budgeting
A DIY herringbone job takes longer than regular floors—about 2–3 days for 300 square feet. Yehui’s pre-cut herringbone kits can cut time by up to 40%.
Skill Level
It’s not for total newbies, but a careful DIYer or builder with basic wood skills can nail this project with patience.
Conclusion
Herringbone floors bring classic charm and a fancy vibe to any spot. With the right tools, stuff, and prep, DIY installation is totally doable and super fun. For builders, designers, or big buyers, grabbing pre-cut, quality materials is the trick to fast, perfect work.
At Yehui, we’re pros at making engineered wood flooring, including custom herringbone kits, for folks worldwide. Reach out today for flooring solutions that fit your project’s style and budget.
From classic oak to modern finishes, Yehui has the herringbone flooring to match your vision. Get started!
FAQ
Q1: What are the MOQ and lead times for Yehui’s pre-cut herringbone flooring kits?
A: Our standard pre-cut herringbone kits have a minimum order quantity of 200㎡, while custom designs start at 1,000㎡. Production typically takes 15-25 days for in-stock items and 30-45 days for customized specifications. For large orders exceeding 3,000㎡, we offer attractive volume discounts ranging from 8-12% to make your project more cost-effective.
Q2: Can Yehui provide technical support for large-scale herringbone installations?
A: Absolutely. We provide comprehensive technical assistance for commercial projects, including free CAD drawings for complex layouts. We also offer ODM/OEM services and provide a wide range of customization options for customers placing large orders. Each large-scale order is assigned a dedicated project manager to oversee logistics, quality control, and timely delivery, ensuring a seamless experience from factory to floor.
Q3: How does Yehui ensure consistency in color and quality for bulk orders?
A: We maintain strict quality control through batch sourcing of veneers from single-log origins, AI-powered color sorting to achieve 98% visual consistency, and rigorous pre-shipment inspections. Every bulk order undergoes random sampling with detailed moisture and tolerance reports, guaranteeing uniform quality across all planks for your high-end projects.